HIR
9011 and 9012 bulbs are exactly identical in all dimensions to 9005 and 9006 bulbs, except for two
areas, the second of which is unimportant for most cars. The
first area is the "center" tab on the mounting flange. When trimming,
you should always look at the bulb from the back, with the plug socket facing down. This prevents trimming
in reverse, where you look at your old bulb from the front and then trim your new one
from the back. There are 3 mounting lugs on the circular base flange, the ones
that fit into the slots in the housing and then rotate home. The ones
at 4:00 and 8:00 are large; they are the
same on all bulbs and don't get trimmed. It's the center or top
ones, at 12:00, that you trim.
On
a 9006 low beam, the top tab occupies a space roughly from 12:00 to 1:00. On an HIR 9012 low beam,
the tab is both double wide and double deep. You need to make it shorter (trim
it to a smaller radius) and also remove the section
from 11:00 to 12:00.
On
a 9005 high beam, the top tab occupies a space roughly from 11:00 to 12:00. On an HIR 9011 high beam,
the tab is the same depth as the 9005 but runs from 11:00 to 1:00. All that's needed to trim it is to remove
the portion from 12:00 to 1:00.
The
bulbs will come marked with white paint. You want to REMOVE THE WHITE PART. This will give you an exact duplicate of a 9005 or 9006
OEM stock bulb.
The
tabs on the HIR bulbs can be regarded as universal, or blank, or
androgynous. They have an excess of top tab, and it is centered on 12:00, so they could be trimmed to fit in either a high or
a low housing, depending on whether you take off the right or the left side of the tab. Remove the left for a low beam, right for a high beam.
Again, you're looking at the back of the bulbs with the plug down.

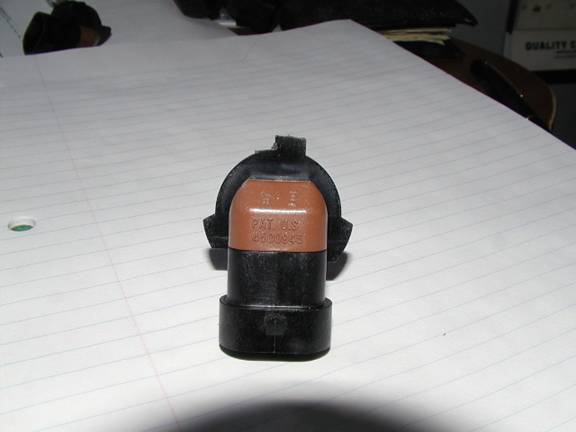
Untrimmed HIR 9012 low beam
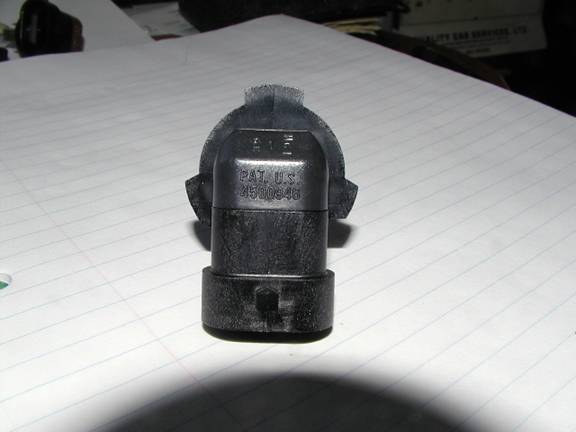
Trimmed HIR 9012 low beam
Untrimmed HIR 9011 high beam
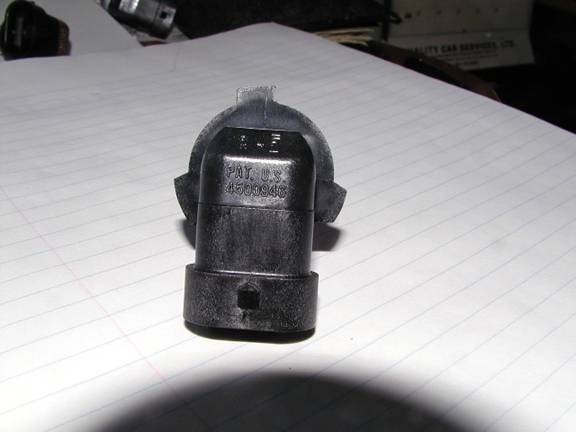
Trimmed HIR 9011 high beam
The plastic on the bulbs is a little bit brittle if you try
to cut too much of it at once, and
it doesn’t cut cleanly like PVC would.
A very good tool to trim with is ordinary
toenail trimmers, the ones that are a large version of fingernail trimmers.
BUT, don’t try to remove very much plastic at
a time; just take small 1 millimeter bites. A Dremel
tool is great if you have one. A cutoff disc
at medium speed
does well, although you’ll get some melting
onto the disc. A hand
file does well also, though it takes a little
longer. Side cutters or end
nippers don’t work well on this plastic.
The trimming doesn’t call
for extreme precision. All you need to do
is remove enough material so that the top tab will fit in its slot on the
housing. If you deliberately ground
it off altogether, the bulb would still fit OK
and function with just the two base tabs. It’s
a quick and easy job for anyone with basic
eye-hand coordination,
and the chance of error is close to zero.
No modification to the
housing is ever required, only the bulb. Also,
no modification to the electrical plug section
is required for stock replacement trim.